Here’s a step-by-step guide to setting up a React project using Vite (https://vitejs.dev/).
Step 1: Install Node.js.
Before setting up a React project with Vite, ensure that you have Node.js installed. You can download it from the location (https://nodejs.org/en).
To check if Node.js is installed, run the below command.
node -v
$ node -v
v20.16.0
Also, verify the npm (Node Package Manager) version.
npm -v
$ npm -v
10.8.1
Step 2: Create a new Vite Project.
Open your terminal and run the following command to create a new project using Vite.
npm create vite@latest
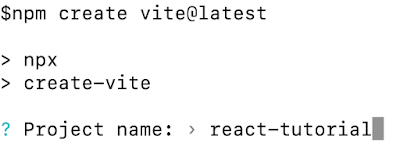
Give the project name as react-tutorial and press enter.
Select the framework as ‘React’ and press Enter.
Select the variant as JavaScript and press Enter.
Once the command is successful, you can see following message.
$npm create vite@latest

> npx
> create-vite

✔ Project name: … react-tutorial
✔ Select a framework: › React
✔ Select a variant: › JavaScript

Scaffolding project in /Users/krishna/Documents/technical-documents/frontend/frontend/react/react-tutorial...

Done. Now run:

  cd react-tutorial
  npm install
  npm run dev
Step 3: Install Dependencies.
Once the project is created, navigate to the project directory and run the following command to install the necessary dependencies.
npm install
Step 4: Start the Development Server.
After the installation is complete, start the development server with the following command.
npm run dev
Upon successful execution of the command, you can see below kind of output.
  VITE v5.4.6  ready in 446 ms

  ➜  Local:   http://localhost:5173/
  ➜  Network: use --host to expose
  ➜  press h + enter to show help
Above command will launch your Vite development server. Vite will display a local URL like http://localhost:5173/ where you can view your React project in the browser.
Project Hierarchy
Open the project ‘react-tutorial’ in any code editor (I am using Visual Studio Code), you will see below kind of project hierarchy.
1. README.md
This file provides an overview of your project. It's a markdown file where you can document important information about the project, such as setup instructions, features, usage guidelines, or contribution details.
2. index.html
The entry point for your application. Usually, it contains a minimal structure since most of the content is handled by React dynamically.
3. package-lock.json
Locks the versions of installed dependencies. This file ensures that the exact same versions of dependencies are installed across different environments (for instance, when your project is cloned by someone else). It contains a detailed tree of dependencies, specifying the exact versions of packages and sub-packages installed. It’s automatically generated and managed by npm when you run npm install.
4. public/
Contains static assets. This folder holds static files that won’t be processed by Vite or React (such as images, fonts, and the index.html). Files in this folder can be directly referenced using relative paths. For instance, if you put an image in public, you can access it using /image-name.jpg. Unlike the src folder, the files in the public folder are served as-is and don’t go through the bundling or processing steps.
5. vite.config.js
Configuration file for Vite. This file contains custom configurations for Vite, such as setting up plugins, configuring the development server, or customizing the build process. If you need to make adjustments to the build, specify aliases, or add plugins, this is where you would do that.
6. eslint.config.js
Configuration file for ESLint (a linting tool). ESLint helps maintain code quality by enforcing consistent coding styles and identifying potential issues in JavaScript or React code. The configuration file defines the rules or presets your project should follow. For example, it might specify that your project uses certain coding conventions (like Airbnb’s or Prettier). You can also customize which rules should be enabled or disabled.
7. node_modules/
Stores installed dependencies. This directory contains all the third-party libraries and packages that your project depends on. These are installed from the npm registry when you run npm install. Each package will also bring in its own dependencies, which will be nested inside this folder. This folder can get quite large, and it’s not included in version control (.gitignore) since others can install it using the package.json.
8. package.json
Contains metadata about your project and its dependencies. This is one of the most important files in a React (or any Node.js) project. It specifies the project’s name, version, scripts, dependencies, and other configurations.
9. src/
Contains the source code of your application. This is where all your React components, styles, and logic live. It’s the heart of your project, and you’ll spend most of your time here.
· main.jsx : The entry point of your React app where the App component is rendered into the DOM.
· App.jsx : The root component of your application, usually containing the main UI or routing logic.
index.html
<!doctype html>
<html lang="en">
  <head>
    <meta charset="UTF-8" />
    <link rel="icon" type="image/svg+xml" href="/vite.svg" />
    <meta name="viewport" content="width=device-width, initial-scale=1.0" />
    <title>Vite + React</title>
  </head>
  <body>
    <div id="root"></div>
    <script type="module" src="/src/main.jsx"></script>
  </body>
</html>
<script type="module"
src="/src/main.jsx"></script>
This <script> tag is the entry point for your React application. It is using the type="module" attribute, which allows for the use of ES (EcmaScript) modules in the browser. It imports the main.jsx file, which typically contains the root React component and is where the app is rendered into the DOM.
main.jsx
import { StrictMode } from 'react'
import { createRoot } from 'react-dom/client'
import App from './App.jsx'
import './index.css'

createRoot(document.getElementById('root')).render(
  <StrictMode>
    <App />
  </StrictMode>,
)
import { createRoot } from 'react-dom/client'
The createRoot method is used to initialize the React application. It creates a root container that will manage the rendering of your React component tree. This method is part of React 18 and later versions.
createRoot(document.getElementById('root')).render(
<StrictMode>
<App />
</StrictMode>,
)
StrictMode is a wrapper component that helps you find potential problems in your React application. It activates additional checks and warnings for its descendants. In this example, StrictMode wraps the <App /> component, enabling these additional checks and warnings for the entire component tree under it.
You can download this application from this link.


No comments:
Post a Comment