Prerequisite
Install jdk15.
This post is divided into three sections.
a. Add Java15 to Eclipse installed JREs.
b. Create a new Java project and configure Java15 as runtime environment.
c. HelloWorld application to confirm the JDK version
Add Java15 to Eclipse installed JREs.
Follow below step-by-step procedure to setup Java15 in Eclipse.
Step 1: Open Eclipse. Eclipse -> Preferences.
Search for jre and select Installed JREs.
Click on Add button available in the right side section of the window.
Select ‘Standard VM’ option and click on Next button.
Set the JRE home path to JDK home and give some name to this JRE (I given as Java15). Click on Finish button.
Create a new Java project and configure Java15 as runtime environment.
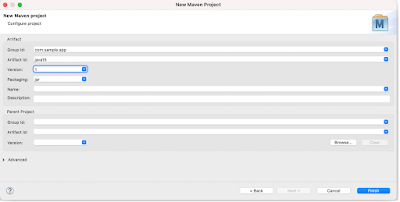
Step 1: Create new maven project.
Select the checkbox ‘Create a simple project (skip archetype selection).
Click on Next button.
Enter
a. Group id as com.sample.app
b. Artifact id as Java15
c. Version as 1
Click on Finish button.
Project structure looks like below.
As you see above image, J2SE-1.5 is configured as default JRE. Let’s configure jdk15 for this project.
Right click on the project -> properties. Select Java Compiler and set it to 15, and click on Apply button.
Set Java build path
Click on Java Build Path.
Go to Libraries tab, Remove JRE System Library (J2SE-1.5).
Select Modulepath.
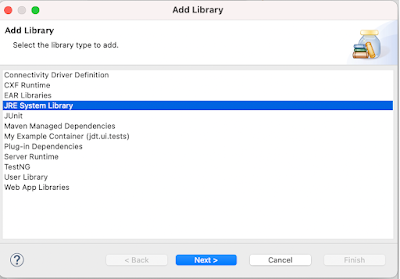
Click on add Library… button.
Select JRE System Library and click on Next button.
Select the radio button ‘Alternative JRE’, and configure Java15. Click on Finish button.
You can observe that Java15 is reflected in the project hierarchy.
HelloWorld application to confirm the JDK version
HelloWorld.java
package com.sample.app;

public class HelloWorld {

	public static void main(String[] args) {
		String javaVersion = System.getProperty("java.version");

		System.out.println("Java version : %s".formatted(javaVersion));
	}

}
Output
Java version : 15.0.2
That’s it you are done…
Previous Next Home


No comments:
Post a Comment