Prerequisite
a. Install python
brew install python
Step 1: Open terminal and execute below command.
pip3 install \
 apache-airflow==1.10.12 \
 --constraint "https://raw.githubusercontent.com/apache/airflow/constraints-1.10.12/constraints-3.7.txt"
(or)
pip install \
 apache-airflow==1.10.12 \
 --constraint "https://raw.githubusercontent.com/apache/airflow/constraints-1.10.12/constraints-3.7.txt"
Step 2: Installing with extra softwares (for example mysql, redis)
pip3 install \
 "apache-airflow[celery, crypto, rabbitmq, redis]"==1.10.12 \
 --constraint "https://raw.githubusercontent.com/apache/airflow/constraints-1.10.12/constraints-3.7.txt"
Step 3: Execute below command to initialize airflow.
airflow initdb
Above command initializes the database for airflow. Airflow requires a database to be initialized before you can run tasks. If you’re just experimenting and learning Airflow, you can stick with the default SQLite option.
After I executed the command ‘airflow’ folder is created in my home directory (/Users/{user_home}/airflow}
You can see .db, .cfg files are created in airflow folder.
$ls
airflow.cfg	airflow.db	logs		unittests.cfg
Step 4: Create dags folder. You need to create ‘dags’ folder.
Execute below command to know the location to create ‘dags’ folder.
grep dags_folder airflow.cfg
$grep dags_folder airflow.cfg
dags_folder = /Users/krishna/airflow/dags
# search for dags in dags_folder,
git_dags_folder_mount_point =
From the output, you can
confirm the location to create dags folder. By default ‘dags’ created in same
folder where .cfg and logs folder located.
$mkdir dags
$
$ls
airflow.cfg	airflow.db	dags		logs		unittests.cfg
Step 5: Unload dag examples ship with airflow.
By default, all the dag examples that come with airflow are loaded, lets unload them by updating the property load_examples to False in airflow.cfg file.
load_examples = False
Step 6: Reset db by executing below command.
airflow resetdb
Above command drop the dags from the metadata database.
Step 7: Create hello_world.py file in dags folder.
hello_world.py
from datetime import timedelta
# The DAG object; we'll need this to instantiate a DAG
from airflow import DAG
# Operators; we need this to operate!
from airflow.operators.bash_operator import BashOperator
from airflow.utils.dates import days_ago
# These args will get passed on to each operator
# You can override them on a per-task basis during operator initialization
default_args = {
'owner': 'airflow',
'depends_on_past': False,
'start_date': days_ago(2),
'email': ['airflow@example.com'],
'email_on_failure': False,
'email_on_retry': False,
'retries': 1,
'retry_delay': timedelta(minutes=5),
# 'queue': 'bash_queue',
# 'pool': 'backfill',
# 'priority_weight': 10,
# 'end_date': datetime(2016, 1, 1),
# 'wait_for_downstream': False,
# 'dag': dag,
# 'sla': timedelta(hours=2),
# 'execution_timeout': timedelta(seconds=300),
# 'on_failure_callback': some_function,
# 'on_success_callback': some_other_function,
# 'on_retry_callback': another_function,
# 'sla_miss_callback': yet_another_function,
# 'trigger_rule': 'all_success'
}
dag = DAG(
'tutorial',
default_args=default_args,
description='A simple tutorial DAG',
schedule_interval=timedelta(days=1),
)
# t1, t2 and t3 are examples of tasks created by instantiating operators
t1 = BashOperator(
task_id='print_date',
bash_command='date',
dag=dag,
)
t2 = BashOperator(
task_id='sleep',
depends_on_past=False,
bash_command='sleep 5',
retries=3,
dag=dag,
)
dag.doc_md = __doc__
t1.doc_md = """\
#### Task Documentation
You can document your task using the attributes `doc_md` (markdown),
`doc` (plain text), `doc_rst`, `doc_json`, `doc_yaml` which gets
rendered in the UI's Task Instance Details page.

"""
templated_command = """
{% for i in range(5) %}
echo "{{ ds }}"
echo "{{ macros.ds_add(ds, 7)}}"
echo "{{ params.my_param }}"
{% endfor %}
"""
t3 = BashOperator(
task_id='templated',
depends_on_past=False,
bash_command=templated_command,
params={'my_param': 'Parameter I passed in'},
dag=dag,
)
t1 >> [t2, t3]
I copied hello_world.py file from http://airflow.apache.org/docs/stable/tutorial.html.
Step 8: Start scheduler by executing below command.
airflow scheduler
Wait until scheduler starts.
Step 9: Start airflow webserver by executing below command.
airflow webserver
Webserver will start at port 8080. Open the url ‘http://localhost:8080/’ in browser. You will see DAGs user interface.

As you see, the dag is in off state by default. If you turn it on, scheduler will trigger the dag as per the defined schedule.
Schedule column is a CRON expression to specify the frequency of the job.
Default owner is ‘airflow’.
Recent Tasks column specify the status of all the tasks of active DAG runs.
Last Run column specifies the execution time of latest dag run
DAG Runs column specifies the status of all previous DAG runs.
Step 10: Let’s execute the DAG by toggling the state from OFF to ON.
Once you toggle the OFF button, refresh the page, you will see ‘Recent Tasks’, DAG Runs will be updated.

Click on Graph View button to launch graph view.
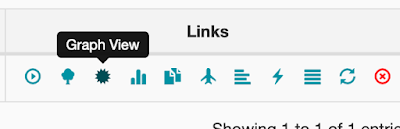
Graph view

Click on any node in the graph to see the task details.

That’s it for this session.
Previous Next Home
No comments:
Post a Comment